Cooking with cannabis is a little more complicated than grinding some black pepper on your meal, however, you don’t have to take a cooking class to understand the cannabis extraction process. With just a bit of knowledge and planning, one day you might have a unique concoction to add to the family recipe book you inherited from your grandma.
The Theory
You can’t add THC to your food as if it was just another spice because your system would throw out most of it. Because THC and fat are both hydrophobic, they are a symbiotic match under the right cooking conditions. This is why THC dissolves in oil-based solvents, making oils and butter the best vehicles to transport precious THC into your food, and ultimately, into your system.
Now, let’s see the preparation method and which of those means of transportation have the largest capacity for THC.
Preparation Methods
All preparation methods start the same way. You need to finely grind cannabis buds but be careful not to make them too powdery as they will be very hard to strain from the end product. (2)
After this, whether you are using water or not, the methodology is basically the same, with the only difference being that you need to make sure to always have enough water (if you’re using in the first place) in the cooking pan to keep the cannabis and oil floating between ½ and 2 inches from the bottom in order to achieve better separation between them and the water.
All methods involve cooking pots and a fridge, so what better reason to get some than this!
From here, the preparation methods of each cannabis-infused product differ very slightlybut are not much harder than making ramen noodles.
Canna Butter
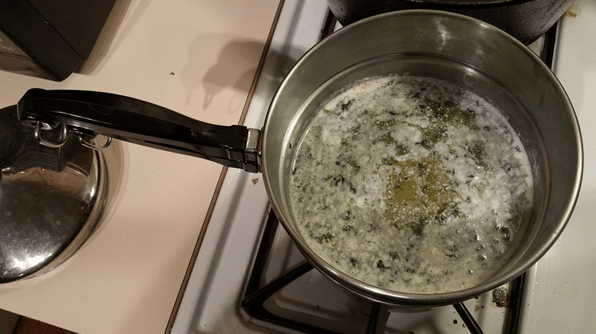
Butter burns much faster than oil, therefore you can’t use a frying pan. In a large bowl, get your water boiling (if you’re using it) on high heat and then add butter sticks. Once the butter melts completely, add the cannabis flower and turn down the heat to low in order for the mixture to barely simmer for about three hours. Once the top of the concoction becomes thick and shiny, it’s ready to be strained into a glass bowl. Put a double layer of cheesecloth on the top of the bowl and secure it with large rubber bands, then pour the mixture and strain it very diligently.
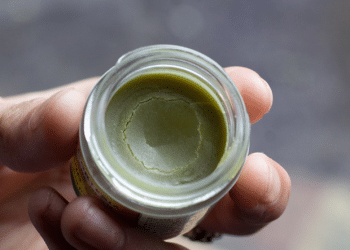
This is the cooking ready. Now, you need to put the creation in the fridge for about an hour. The butter will rise to the top and become a solid, THC-packed wonder. Now, all you need to do is scrape it off the water and wrap it in wax paper – you can even use the one where the original butter was in, and store in the fridge.
The general proportion is four sticks of butter for every ounce of cannabis.
Canna Coconut Oil
After the initial phases, stir in the cannabis, adding more water (if you’re using it) if needed to make sure the cannabis and the oil are floating. What’s very important in this method is not to let the temperature of the mixture exceed 270°, otherwise the THC will burn off. In fact, once it reaches 250°, turn the heat to low and leave to cook for 12 hours, still making sure the temperature is below 270° and adding water if needed to keep everything floating.
After 12 hours, let it cool for 10-15 minutes, and from there, everything is the same as with canna butter, with the only difference being you need to leave the bowl in the fridge overnight.
The general proportion is 16 oz of organic coconut oil to 1-3 oz of cannabis.
Canna Olive Oil
The process with olive oil is identical to coconut oil. What is worth mentioning though is that it is considered by some to be the best solvent in absorbing THC. (3) Add this to its vast array of applications, not to mention renowned health benefits, and if this was a competition, we have ourselves a winner!
Honorable mention – Bacon fat
While hardly anyone will advocate bacon’s health benefits, its flavor ones don’t need any representation. When frying bacon, simply collect the drippings in a jar and repeat the process of canna butter preparation. You will clearly need a good amount of bacon to produce enough residue fat, but if you’re feeling particularly indulgent, there’s hardly a more mouth-watering way.
To Use or Not to Use Water
Some people prefer cooking with water, others without, and neither party is wrong. (4)
With
Cooking with water is considered to have three main advantages.
First, it helps separate trim and oil, and it’s often easier to let the layers naturally separate than squeezing the plant material through a fine mesh. The water acts as a separator during the cooling stage as well.
Second, because trim leaches more chlorophyll than water, cooking with water subdues the chlorophyll flavor, making for a product that is easier to combine with different foods.
Third, the waste plant material will also sink to the bottom with the water, leaving the clarified oil to float on top.
Without
It’s believed that residual water in oil can serve as an environment for bacterial growth, making cooking without water the safer option.
Furthermore, some think water changes the consistency of the canna oil/butter, which respectively changes the consistency of the final product, especially with cakes and baked goods.
Last but not least, the fact that water reduces flavor is actually considered a disadvantage by those who, similar to a master chefs or bartenders, can channel that harsh tasteinto enriched, yet balanced creations. Not to mention the trim can be saved for hash this way.
Cannabis cooking is much easier than most people think, and as with cooking altogether, timing is key. Once you learn how to extract THC into oils and butter, the combinations are limited only to your particular taste and imagination. A canna French toast might become your new favorite morning ritual!
References:
- http://www.weeddepot.com/learn/blog/top-3-extraction-methods-cannabis-cooking/
- https://thestash.wikileaf.com/edible-extraction-methods/
- https://hightimes.com/edibles/which-fat-absorbs-thc-best/
- https://www.thecannabist.co/2015/04/22/how-to-make-cannabutter-recipe-water-method-canna-oils/31978/
