Cannabis legislation is changing across the world, with more countries legalizing its use for medicinal and recreational means. This is unsurprising considering the potent power cannabis has to help in the management and treatment of conditions like Chrons, sleep disorders, and anxiety disorders, and its potential for curing diseases like cancer. [1]
However, for cannabis to be used after harvesting, it needs to undergo crucial post-harvest operations that ensure consistent quality of products. Unfortunately, as it currently stands, the cannabis industry relies on different traditional post-harvest operations, and this has led to inconsistent quality.
This highlights the fact that few people realize that the most important post-harvest operation involved in cannabis is drying along with storage and curing. [2] These post-harvest methods ensure excellent quality cannabis because drying helps extend the shelf life of cannabis while preventing mold growth, and curing enhances the flavor.
In this blog, readers will learn how to dry and cure cannabis to extend its shelf life and enjoy the most benefits. They will also learn the common mistakes in the drying and curing process and how to address them.
What’s The Actual Difference Between Drying and Curing Cannabis?
Although drying and curing are both integral parts of the process surrounding extending cannabis shelf life, they are two separate techniques that serve different purposes.
Drying is the first step after harvesting. This is when the excess water in cannabis is removed quickly. With excess water removed, a grower has a reduced chance of encountering mold and mildew problems. In addition, growers are less likely to contend with pests and often experience better long-term storage outcomes after drying their crops.
On the other hand, curing is a more time-consuming process after drying. It slowly removes moisture from cannabis during controlled storage in a pre-determined environment that is conducive to preserving the cannabis. However, this doesn’t mean that curing is something to forego.
Often, individuals choose to cure cannabis because it promotes positive chemical changes like the removal of chlorophyll, which makes smoking cannabis smoother while helping buds retain terpenes, which enhances flavor and aroma. So drying and curing are both worth doing.
Drying and Curing Cannabis
With knowledge of drying and curing and how these processes can benefit cannabis crops, it’s time to discover more about drying and curing cannabis. In the sections below, readers will learn everything they need to know, including the equipment and environment needed to dry and cure cannabis to reap the benefits of each process and ensure high-quality yields.
How To Dry Cannabis Buds for Better Shelf Life
Before diving into the steps of how to dry cannabis for better shelf life, it’s essential to make sure that the right tools are acquired. Below is a list of tools you’ll need to dry cannabis crops:
- Fan
- Drying rack
- Air conditioner
- Hygrometer
- Dehumidifier
In addition to the above tools, you’ll need a dedicated drying room to complete the process. Many use a dark room, kitchen, warehouse, or lab as these areas are typically dry, and the temperature is easier to control.
Steps To Take
- Decide between Dry and Wet Trimming
Before you can begin drying cannabis, you need to trim it. The art of trimming involves removing sugar leaves from buds. There are two types of trimming methods: dry trimming and wet trimming. Dry trimming is done after you have dried the cannabis plants, while wet trimming is done immediately after harvest.
- Dry Trim
Those planning on dry trimming their plants need to start by cutting the cannabis plant at its base. After doing this, the cannabis plant needs to be hung upside down or dried in a room with a fan.
Regardless of whether the plant is cut and dried upside down or with a fan, the environment where it is being dried needs to be controlled with a temperature of 70 degrees Fahrenheit and around 50% humidity
After the plants are dried, you will trim each plant’s branches and prepare them for curing. Those who choose dry trimming do so because buds that have been dry trimmed cure better.
- Wet Trim
Should you decide to wet-trim cannabis plants, you’ll begin by removing the sugar leaves immediately after you have harvested the plants. If you choose to do this, you should note that the leaves will be wet and sticky.
That’s why you’ll need to place the trimmed buds on a drying rack in an area with a fan. The fan will blow the buds dry, and then you can cure them. Most people choose to wet trim and dry because it’s easier to trim cannabis plants directly after harvest, and there is less chance of mold developing.
How to Cure Cannabis Buds to Improve Shelf Life
The curing process is just as straightforward as the drying process, and as is the case with the drying process, you will need a few items of equipment:
- Individual hygrometers for each jar.
- Airtight storage containers. ( Most choose glass jars like mason jars.)
Like with drying cannabis, you will also need a controlled environment to cure your cannabis.
Steps To Take
- Prepare Your Buds
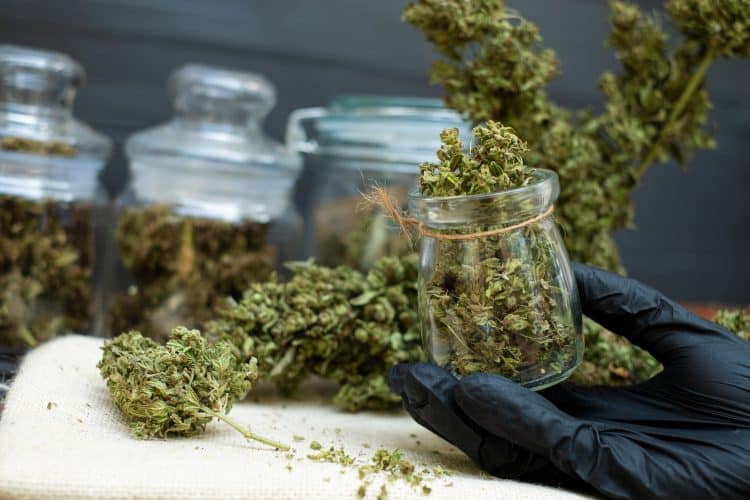
Once the buds are dry and you have achieved your desired moisture content, trim off any remaining leaf matter. Then, place them loosely into mason jars, filling them about 75% of the way. This creates the optimal environment for curing.
- Store The Buds
Keep the jars in a cool, dark place and tightly sealed to create a controlled microclimate. For the first week or so, open the jars daily for a few minutes to let the buds “breathe” or ‘burp’ and check for any signs of mold.
If there are signs of mold, there could be a problem, so it’s essential to control the environment where your jars are stored and ‘burp’ the containers periodically. You should also use a hygrometer to ensure humidity is around 50%.
- Wait for the Curing
This is the hardest part! A good cure takes at least 2-3 weeks, but many cannabis aficionados swear by a 4-8 week cure for optimal flavor and potency. You will need to be patient as you don’t want to stop the curing process too soon and risk the potency and quality of the cannabis.
The Common Mistakes Made During Drying And Curing And How To Address Them
Unfortunately, even with careful attention, you can still encounter mistakes and problems during the drying and curing processes. Below is a detailed account of common mistakes and how to address them to ensure you don’t waste time, money, and energy.
Excess Moisture
If there is excess moisture, your buds will feel spongy and damp to the touch during the curing phase. This often leads to mold growth and degradation of your cannabis’s quality. To fix this problem, remove the buds from the glass jars and let them air dry in a well-ventilated area.
While the buds are air drying, ensure the room does not become more humid than it should be, as this would defeat the purpose of removing the buds from their jars to dry them. Once moisture levels have normalized, you can place the buds back into the jars to cure for longer.
Mold and Mildew
The smell of ammonia is a telltale sign that anaerobic bacteria are present in your cannabis buds. This bacteria causes rot, mold, and mildew, all of which can occur during the drying or curing stages.
Besides the smell, you can identify moldy or mildewed cannabis buds by looking for fuzzy green or white spots. These spots often carry a musty odor, and you’re more likely to have this occur if the controlled environment where you are drying or curing your cannabis is too warm and humid.
To fix this problem, you need to immediately remove moldy buds and examine surrounding areas for contamination. Once you have done this, you can lower the humidity level where you are drying or curing your cannabis. You should also increase circulation, as this can help prevent further mold issues.
Overdrying
During the drying phase, it can be incredibly easy to overdry a crop. If the buds are brittle, dry, and at the point of crumbling when handled, it indicates that there has been overexposure to air and that there isn’t enough moisture in the crop. Unfortunately, overdrying can decrease potency and diminish flavor and aroma.
To address this problem, a grower needs to rehydrate the cannabis buds by putting them into a sealed container containing a humidity pack. The humidity pack should help to add more moisture to the buds. To check for moisture, a grower can routinely check for signs of rehydration with a hygrometer. This device will also indicate if too much moisture is present.
Fluctuating Humidity and Temperatures
After cannabis buds have been dried and cured, they need to be stored correctly. Inconsistent environmental conditions in storage locations, such as fluctuations in temperature and humidity, can adversely impact the quality and stability of your stored cannabis by accelerating degradation.
To prevent this, growers should consider investing in climate-controlled storage solutions, such as specialized electronic humidors, to maintain stable conditions. They should also regularly monitor and adjust temperature and humidity levels as needed.
The Wrap-Up On Drying and Curing Cannabis To Improve Its Shelf Life
Ultimately, it’s recommended that you consider drying and curing to reap the most benefits from your crop. To do this, follow the steps detailed in this blog regarding how to dry and cure cannabis buds to improve their shelf life. You should also take note of the common problems and solutions associated with both methods to enhance the flavor, smoothness, and potency of cannabis buds.
Research:


